My Pages

Saturday, December 31, 2011

Images for stampmaker & a scrapbook layout entitled 'Cucu Nenek'

Hi there! I found these few great images ( apart from many images that I have downloaded to my computer ) and was thinking that it would be great if I can make a stamp out of it using my TC stampmaker. I have not use it for quite a while now. Guilty. Now that I have a new printer, I do hope to solve the earlier problem that I had on the printing quality. If you go to my earlier post on stampmaker, you will know what I mean. It's a very common problem, I think, once I googled around for the solution. At that time, since I didn't want to waste the negative, I have printed the image twice and had it overlapped before I put in the machine. It worked well.

So, this weekend, I'm hoping to try a new image as shown here and see the outcome of it. I'm still browsing for new images and they have real good ones at The Graphics Fairy.
They have nice vintage images there.

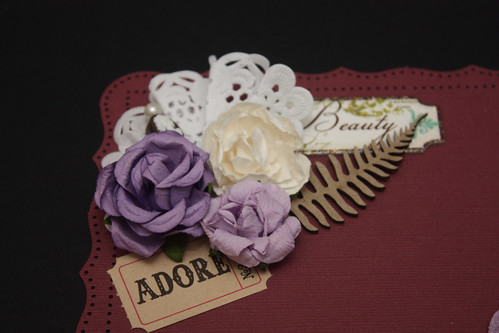
I wanted to upload a new layout, which I did a week ago but wasn't quite pleased with the end result. It's yet again another simple and clean layout and it was actually a challenge created by my mom. We went to Scrap n Crop together last 3 weeks and she has picked some items she wanted me to use for a layout. Most of them were ribbons and flowers. I even had my first try on MS paints on grungeboard alphas in this layout. Here's a glimpse of it...

So, when I thought that i am done with this layout, I still think that I need to work on it some more. I guess my mojo was lost half way through the layout. Has that ever happened to you? I couldn't decide what else I need to complete the layout. So, here it is anyway....

Materials used for the layout:
Card stock: Bazzil Basics
Flowers: Prima
Chippie: Dusty Attic
Paint: Martha Stewart
Ribbons: emm......hmmm...
Vintage ticket ephemera: Tim Holtz's.... ( I think...)
Push pin: Webster's Pages

TFR&L! Ciao!

Wednesday, December 28, 2011

DT at Papier

DT at Papier 

Check out the link above!
Yes indeed! I am now officially one of the four DTs at Papier, The Curve! This is the second DT stint for me and definitely is different from the first one. I think it is going to be a busy one with this new assignment since I have to produce a project every week of the month! Lol!

Anyway, I truly appreciate the fact that I have been invited as a DT with Papier and I do hope that I will breeze right through the term. Kak Liza and Amelia are the current DTs with Papier and their works are simply amazing. Superb!

Quite excited to start! I have already completed 2 projects for Papier! Lol!
So, watch this space and do visit Papier for your endless craft supplies!

TFR!
Hugs!

Wednesday, December 21, 2011

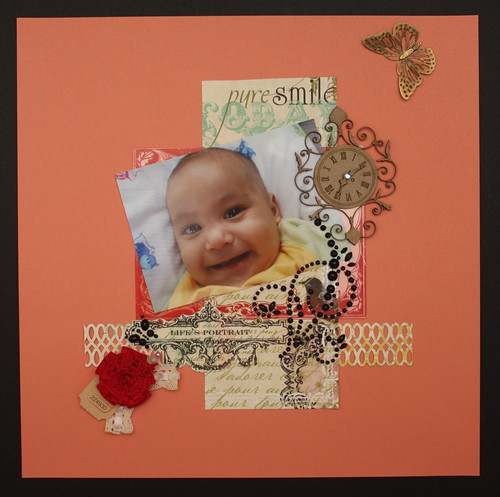
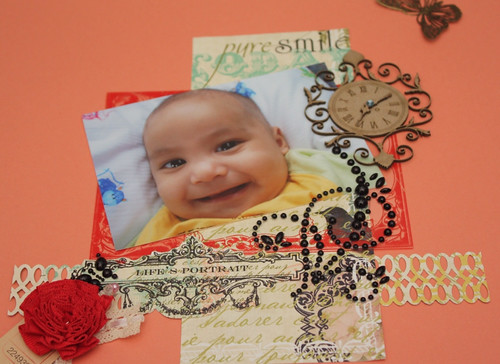
Life's Portrait - a scrapbook layout

Hi there! It's 11:15pm and my mind is still kinda wide awake. Kinda. The boys are watching Transformers the Movie ( cartoon ) and I have been ignored. Yayy... And that means I can happily creep into my crafting room and they won't miss me at all!
So, here's what I managed to do when I was in my studio; yeah..photographing some of my layouts that I did couple of nights ago...or was it a couple of weeks ago?!

I dunno...I guess I'm just into simple and clean layout at the moment. I like how the photo and the embellishments take centre stage on the layout. I'm sure you can do it even with 12 x 12 patterned paper, but somehow; to me, the effect is quite different. Maybe it's just the mood. When I'm quite stressed at work, I came back and do simple layout. So, I guess I'll be doing busy layouts when I'm less stressed? Hehe...

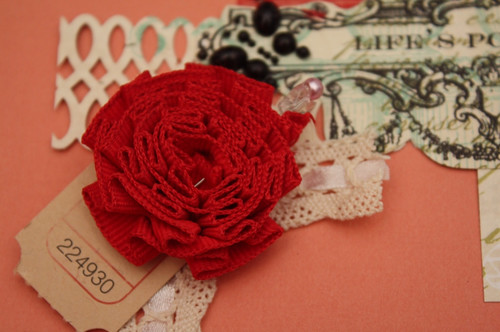
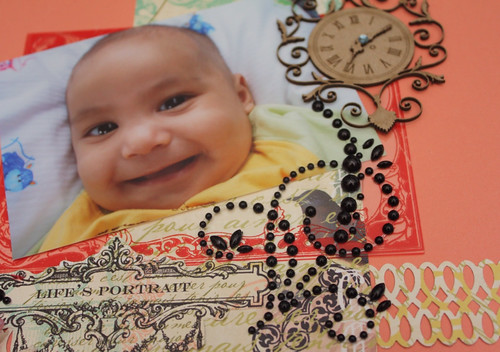
Ok, a bit on the layout now. I've used a folded twill from a Maya Road shadow box kit, which I bought from Papier and just roll it into a flower. It was secured with a push pin from WP. As always, my favourite is to use lasered chipboard from Dusty Attic. My chippie supplies are really running low... :( need to re stock fast!

I have also used a transparency from Glitz Creations and placed it behind the photo.

( I have added this as my take on TCR#91 on 30/12/2011)

Thanks for looking and reading! Ciao!

Materials used for this layout:
Card stock: Bazzil Basics
Pp: Webster's Pages
Punch: Martha Stewart
Vintage ticket: Making Memories
Lasered chipboard: Dusty Attic
Transparency: Glitz Creations
Swirling gems: Prima

Note: swirling gems- ok, can't recall its actual name for it....but u know which one I mean ya! Lol!

Friday, December 16, 2011

Sweet for 365 days - a scrapbook layout

Hi there! Today I want to share with you a layout that is as always ..a simple one from me using the Webster's Pages paper. The thing about WP paper is they are so beautiful that, for me, I feel like I don't really need to work hard on my layout and I can keep the embellishments to the minimum. I don't like to hide the designs on the paper so either I keep stuffs to the minimum or I just cut-out the designs from the paper to be used as an embellishments on a plain card stock. You might have come across these on some of my previous layouts.

Initially, the layout is entitled 'Sweet' but since there is a list of months with dates on this paper, I would like to finally give the title to this layout as ' Sweet for 365 days '.
I guess that's how sweet life is for me when I see his face everyday.

Some more close-ups below. Thanks for visiting!

Materials used:
Paper: Webster's Pages
Metal birdcage: Prima
Butterfly: Martha Stewart
Flowers: Prima
Chipboard: Dusty Attic
Designer thread: Webster's Pages
Layered chipboard: My Mind's Eye
Shabby key frame: Melissa Frances
Other pp: Prima 6 x 6 cut outs.

Ciao!

Monday, December 12, 2011

Altered shadow box frame - a kit by Maya Road

Ok yes..it's actually a kit from Maya Road and yes..ok....I didn't really follow the instructions. When I first saw the kit, I had something else in mind and mostly did not involve a lot of the items inside. Not that I don't like them, but well, I just had something else in mind...hehe

So, here it is. An altered Maya Road Shadow Box kit. Some of the items that did not come with the kit are the chippie, the metal owl, chipboard butterfly, shabby frame set with flowers and vintage trinket, some of the flowers. I guess there are more other items than those from the kit itself. lol!

I basically applied gesso on the box and later another layer of metallic brown paint. I wanted to give it a dark brownish look so, I think I have achieved that.

Thanks for looking and reading! Ciao!

Materials used:
Layered chipboard: MME and Prima
Chipboard: Dusty Attic & Kaisercraft
Flower bouquet: D'Nata
Flowers: Prima and some from the Maya kit itself
Shabby frame: Melissa Frances
Vintage Trinket: Prima
Twine: Hero Arts
Pearls: Queen and Co.
Apothecary bottle: Art store at Tmn Melawati
Sparklers: Webster's Pages

Friday, December 9, 2011

This Is What Love Looks Like - frame

It's Friday and very much looking forward for the long weekend since Monday is a public holiday. Feels like I can do tonnes of craft works at home but I'm sure the moment I sit down on my chair, I'll be cracking my head on which to do first. Yes, ideas are there but realizing it is another thing! For example, I just bought a gorgeous kit from Maya Road last week and already started on it and up till today, I still having a hard time painting the config box. I must have painted it several times since I just couldnt get myself satisfied with the end result! If all is well and turns out good, I will post it soon. So watch this space! Lol!

Ok, this one is actually unplanned from me. I bought a vintage themed kit from Melissa Frances and been keeping it for quite a while. I wasn't sure what to make out of it and I wasn even sure of its entire contents except of course its vintage theme. Thought of doing something so that I can include in my 'for sale' items over at TM. Then I found a perfect photo and a perfect shabby frame ( also by MF ) and hey! I sure am gonna keep this! So, it's there now on my Mom's new console table along with other picture frames and my 'art works' in the living room. Ha!ha! Of course lah my Mom insisted to keep this one lebih2 lagi gambo cucu dia kat situ!

Now, she has asked me to do an altered frame for another photo of my DS. I think the photo is about A4 in size and that means a bigger frame is required! Well, bought that one too from Ikea and can't wait to start ! See, banyaknyer lah ideas.....buat atau tak tu, lain kira...hehehe...

Materials used:
Vintage theme kit: Melissa Frances
Black lace: Chinese shop near my house
Cut flowers pp: October Afternoon ...think so!
Journal tag: MME
Shabby frame: Melissa Frances

TFR&L! Ciao!

Thursday, December 8, 2011

I Like Everything About You - a card

Yess...and a very simple one....

I love this card. To me, even though it's simple, it's quite eye-catching.

The tag is from My Mind's Eye, lace sticker is from Cristina Re and the cut flowers; I think it's from October Afternoon ( I think! )

I think I'm going to Papier again to buy some more of these tags. Love them very much cos I find it very neat and like a quick fix. Just when you are out of ideas on journalling, you can just use these tags onto your layout or cards and voila!

I did quite a number of cards last week and this is one of it. Mojo came to visit and stayed for a bit longer than expected. My mind at the moment is a bit free from the office works. The tender that I was working on was submitted on time and everyone was happy and so legaaaa....... More airspace in my lungs at last....

Okie dokie, gotta go now. Till then! TFR & L! Ciao!

Saturday, December 3, 2011

That Magical Smile - a scrapbook layout

Hi there! I'm back this time with a scrapbook layout featuring (most importantly); my son's magical smile.

This was taken when he was about 1 year old and he's always generous with smiles.
But he's a bit shy now.

Since I haven't been playing in Color Room for quite a while, I just thought this layout will be my take on the #87 challenge. I am not sure if it meets the color template though but I just want to play along. It's 2:35 am to be precise now and I am still wide awake. I have just recovered from a stomach cramp and a nasty one I tell ya' . I've been frequently sick throughout 2011 and I hope my health gets way a lot better in 2012! Hopefully....

Well, on this layout, hmm...I don't think there's any new techniques I have used here that I must tell. It's a simple layout really. Easy peasy lemon squeezy...Lol!

But then again, nothing beats that magical smile, yes! That's the one divine thing!

Materials used for this layout:
Pp: Kaisercraft, WPs
Vintage trinket: Bo Bunny
Die-cuts: Kaisercarft Collectibles
Smile: Faiz....Lol!

TFR&L! Ciao!

Thursday, December 1, 2011

Merriest Wishes - holiday season card series

Hola! Another holiday season card series from me. Simple one again.
Did this last week. On sick leave today, my stomach cramp is so terrible I can hardly walk.

Materials used for this card:
Pp: Prima
Embossing powder: Ranger
Rhinestones: Kaisercraft

TFR&L! Ciao!